Planning Wood Wool Finishes for Walls and Ceilings
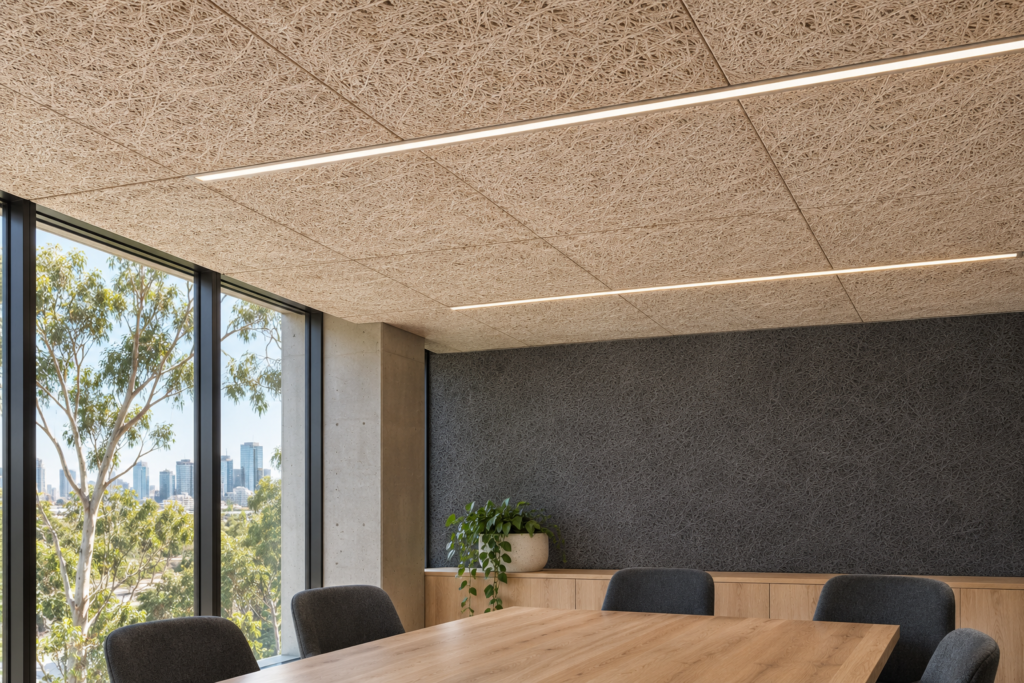
A wood wool ceiling can introduce texture and help manage sound reflections in a room with hard floors, glass and other reflective surfaces. Where the finish goes depends on how people use the room and how much uninterrupted space the design allows. In a meeting room, wood wool ceiling tiles might extend across the room or form a defined area above the table. Lights, vents and access points will influence how much of that area is available. Where the ceiling is already crowded with services, wood wool wall panels offer another surface to consider as part of the acoustic design.
Start with the room and the sound problem
Two rooms with the same floor area can need different treatments. In a café with polished concrete floors and large windows, several conversations may contribute to the noise people hear at their tables. In a meeting room, the concern might be speech sounding hollow on video calls. Describing what people hear, where they hear it and when it becomes a problem gives the design team a clearer brief than simply asking for a quieter room.
It also helps to distinguish between sound reflecting within a room and sound travelling into an adjoining space. A panel layout designed to reduce reflections addresses the first issue. If the concern is conversations carrying into the corridor, the design team needs to investigate the door, partitions and other paths the sound could take. That distinction affects where the project team puts its time and budget.
Coordinate the layout with lighting and services
An overhead finish can make good use of space in a room where the walls are taken up by windows, joinery or whiteboards. The available area becomes clearer once the panel layout is drawn alongside the lights, air grilles and access hatches. In a long room, aligning panel joints with a row of lights might give the ceiling a clear rhythm. If the fittings sit off-centre, adjusting the first row of panels may produce more even borders at the walls.
A wall application brings different decisions. In a shared workspace, the most practical wall may also need to accommodate screens, power outlets and furniture. Drawing these items together helps reveal awkward cuts and narrow strips before ordering. In a corridor or busy breakout area, the team can also consider where chairs, bags or trolleys are likely to brush past the finish and decide how to detail the lower edge.
Compare the tested installation with what fits on site
The absorption figure for a panel applies to the configuration used in the test. Panel thickness, the depth of the cavity behind it and the presence of acoustic backing can all influence the result. A panel fixed directly to a surface may perform differently from the same panel mounted with an air gap and backing. When comparing options, the project team can check the mounting details behind the published figures and confirm that the proposed arrangement fits within the depth available on site.
Changes during a fit-out can affect those assumptions. If a duct takes up more space than expected or the ceiling level has to move, the revised detail may leave less room behind the panels. Recording the intended build-up on the drawings gives the contractor and design team a reference when resolving those changes. It also makes it easier to compare quotes based on the same installation.
A finish sample can settle visual questions while those details are being worked through. Looking at it beside the specified paint, joinery and light fittings helps the team judge colour and texture in context. A sample large enough to show a joint is especially useful when the panels will cover a broad surface. A well-planned acoustic finish brings the panel layout, lighting, access and tested installation together before the commercial fit-out reaches site.