How to Plan a Stepping Stone Path Through a Garden
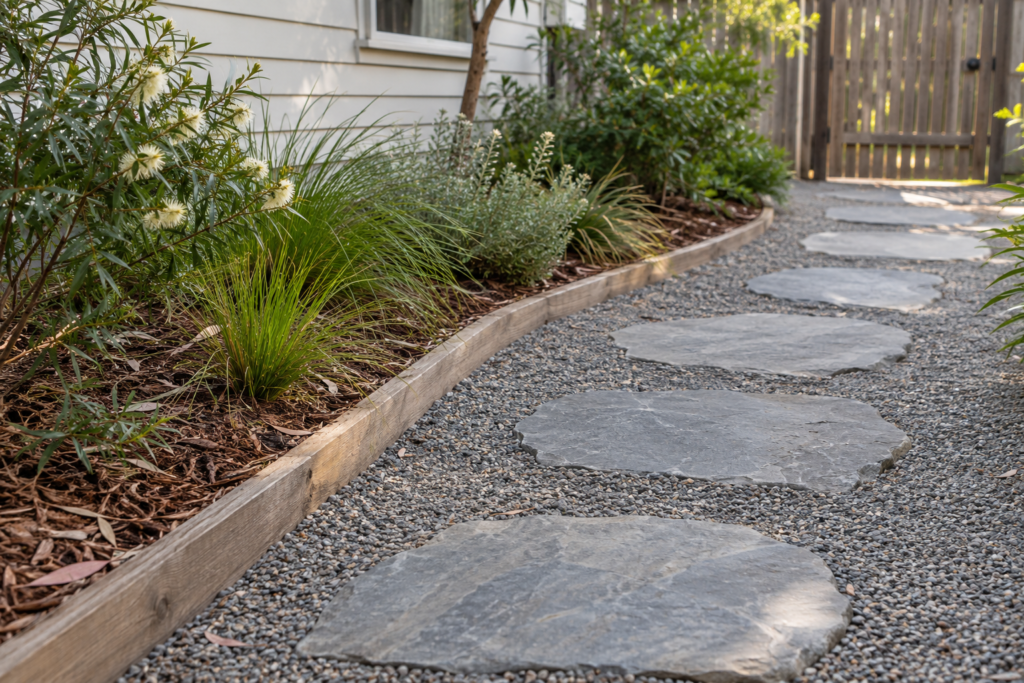
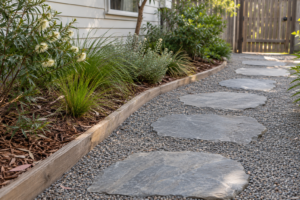
A path from the back door to the clothesline needs to feel comfortable underfoot, even when someone is carrying a full washing basket. For a path built over soft ground, compacted crushed rock can provide a firm base beneath the stones. The route should follow the way people already cross the garden, with enough room to pass plants and open gates. Once the route is marked, garden stepping stones can be laid out temporarily to test the spacing before any digging begins. The trial layout also shows where the path meets planting beds and lawn. Along planted edges, garden mulch can cover exposed soil and create a clean border around the stones.
Walk the route before marking out the stones
A garden path is easier to use and maintain when its route, stone spacing, base and adjoining planting beds are planned together from the start. A hose or length of rope makes it easy to mark out the route and shift it as needed. The person planning the path can then walk it from both directions and test the places where they will turn, step off a patio or pass a garden bed. A curve that looks gentle from the back door can feel tight when approached from the other end.
It also helps to walk the garden after rain. A low spot that looks firm on a dry afternoon may collect water from a nearby paved area. Shifting the route can avoid a recurring puddle, while a path that needs to cross the low spot may call for a closer look at drainage before work begins. Where the route runs alongside a young shrub, allowing room for its mature spread can keep the path clear as the garden fills out.
Test the spacing and prepare a stable base
The easiest way to test spacing is to lay out the stones, or cardboard cut-outs of the same size, and walk across them at a normal pace. The useful measurement is the distance between the spots where feet naturally land. On irregular stones, those spots may sit away from the centre. The person setting out the path can take several passes, including one while carrying something they use regularly, such as a laundry basket or watering can.
At a gate, a wider stone can give someone room to stand while opening the latch. A wider landing can also help where the path changes direction or meets a step. If the route regularly carries a wheelbarrow, a continuous surface may be more practical along that section, especially where the wheel would otherwise drop into gaps.
Once the layout feels right, each stone needs support across its underside. The depth and preparation of the base will depend on the soil, the stone and the supplier’s installation instructions. During installation, checking each stone for movement before finishing the edges makes it easier to correct a high spot or a hollow beneath it. The transition onto existing paving is worth checking on foot, since even a small lip can catch a toe on a route used every day.
Finish the edges with maintenance in mind
The surface alongside the stones affects how much work the path needs later. Where a planting bed meets the route, edging can help hold loose material in place. Keeping the finished bed surface slightly below the top of the stones gives displaced material somewhere to settle and makes it easier to sweep the walking surface clear. Where the route crosses lawn, the stone height and spacing should allow for mowing or trimming around the edges.
After the first spell of wet weather, a walk along the path can reveal where soil has shifted, a stone has begun to move or loose material has washed onto the surface. A wobbling stone can be lifted and its base checked before it is reset. That first inspection also shows where a short section of edging or a small change to the adjoining bed could make the route easier to maintain.